Moving code from a notebook into a function or class#
Some of the development of stellarphot ends up happening in Jupyter
notebooks. Eventually that code really ought to move into a function or
class and ideally have some tests written for it.
This is often relatively straightforward, if somewhat painful.
An outline of the steps required is:
Decided how to break up the code in the notebook. When in doubt, start by breaking the code in the notebook into relatively small chunks.
Move the code from the notebook into a function or class into a
stellarphotfile. You will need to decide where to put the new code instellarphot. You will also need to identify the variables that are used in the code and pass them as arguments to the function or class.Import the new function into the notebook you moved the code from. Try to run the code in the notebook and make sure it still works.
Write tests for the new function or class. Put the test into the
testsfolder in the same directory as thestellarphotfile you created.
Example#
The following example is based on the notebook
stellarphot/notebooks/photometry/06-transit-fit-template.ipynb. If you
look at the notebook at the git commit 05f11bb you will see that it
contains a number of cells that graph the airmass and several other things
below a transit fit. The specific cells are circled in the image below.
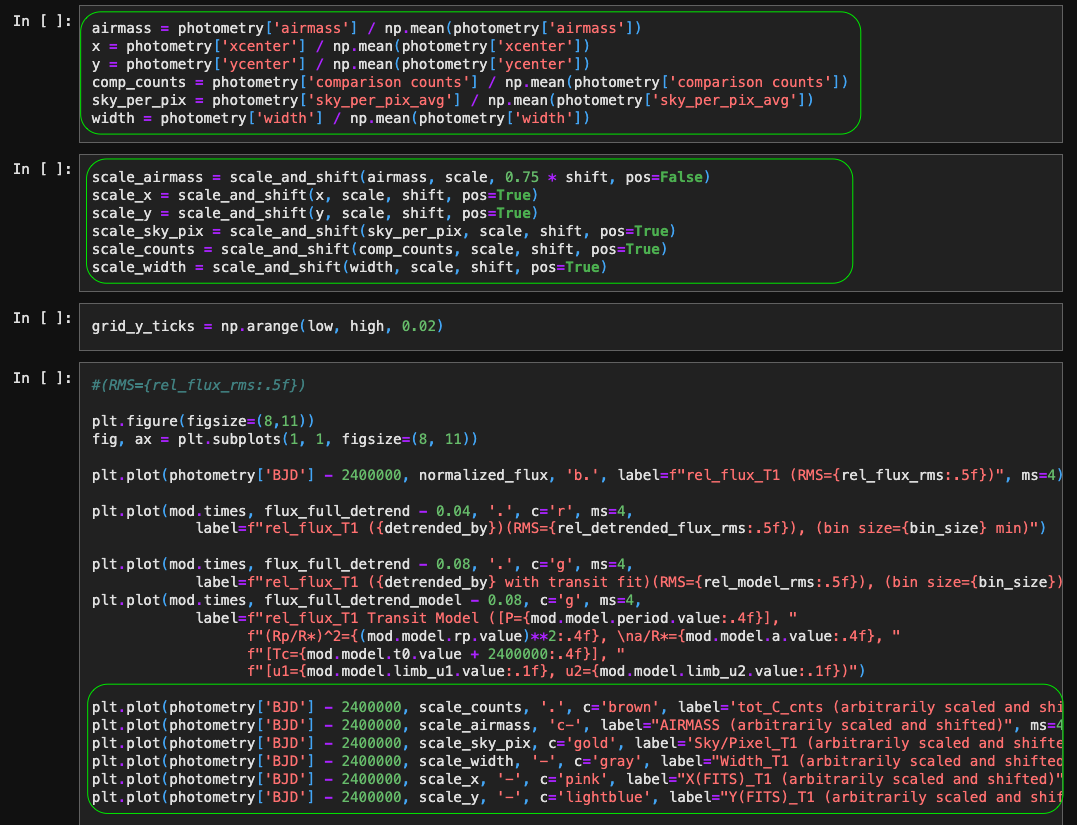
Note that there are not that many inputs to the code in those cells. They need the photometry table and a few other parameters.
The code in those cells was moved into the function
stellarphot.plotting.plot_many_factors. The notebook was modified in
this commit to drop the code in the cells and replace it with a call to
stellarphot.plotting.plot_many_factors.